OpenAI Codex 国内使用
OpenAI 官方出品的Codex,另一款强大的类似于Claude code 的AI编程助手,结合使用目前最强的gpt-5 或 gpt-5-code 大模型,能快速提高编程效率。
这里主要详细介绍了:codex cli 以及 vscode插件。
安装 OpenAI Codex
安装Nodejs, 这里略过。
通过npm 来安装:
npm install -g @openai/codex通过homebrew 来安装:
brew install codex测试安装,输入codex --version,正确显示版本号,则代表成功。
codex --version
codex-cli 0.53.0
配置 OpenAI Codex
启动codex,输入命令:
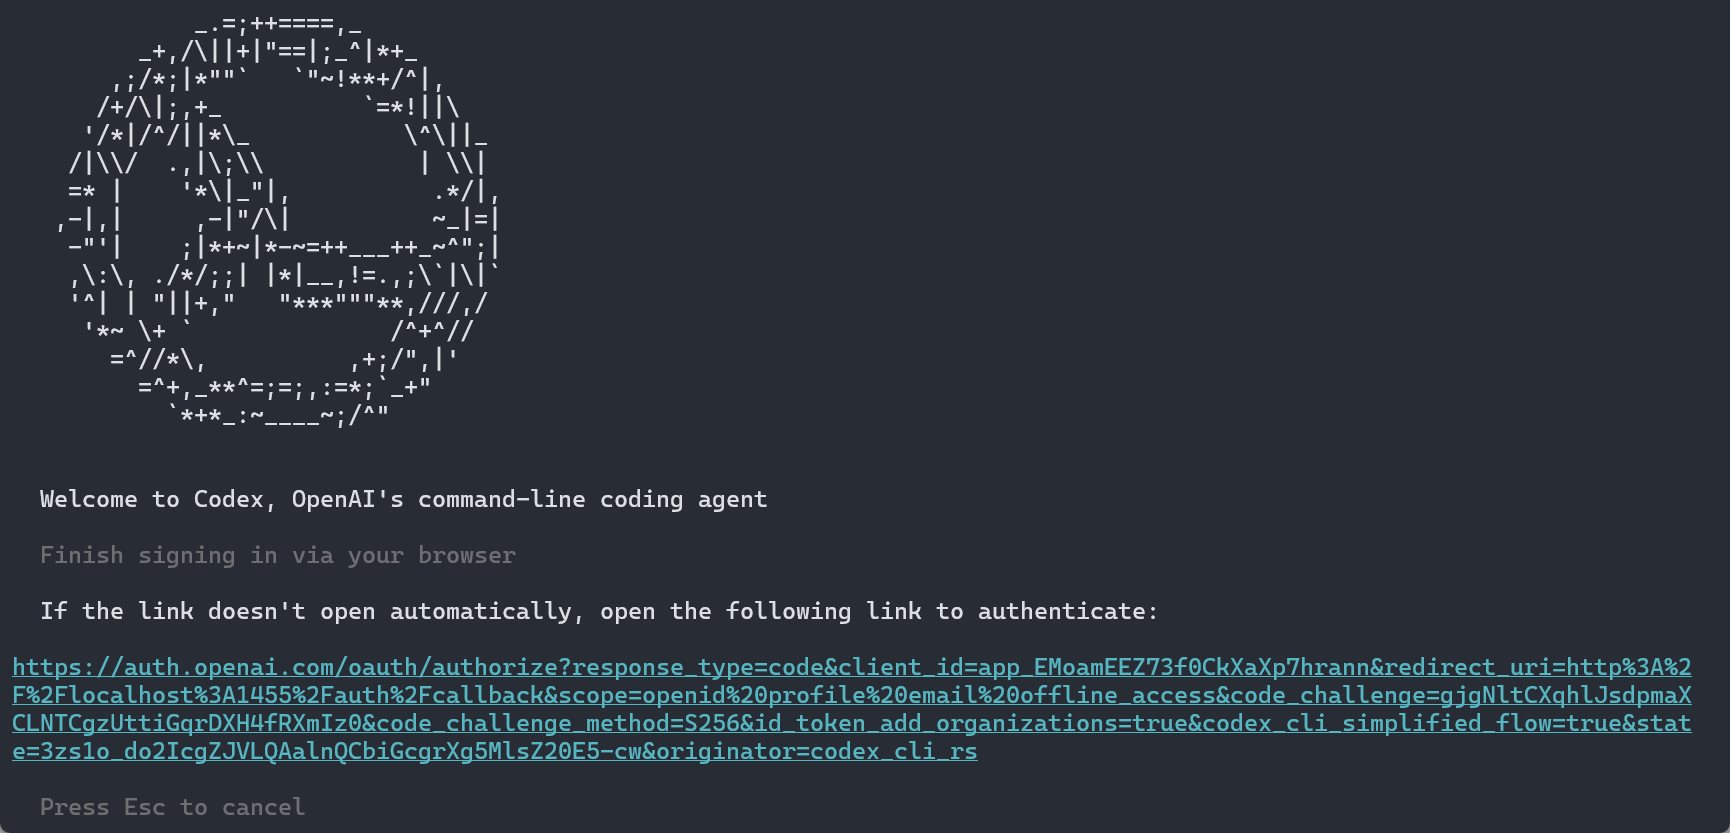
codex会出现如下界面:

如果你Windows本地安装有WSL2,则可以使用1,方法很简单,参考如下:

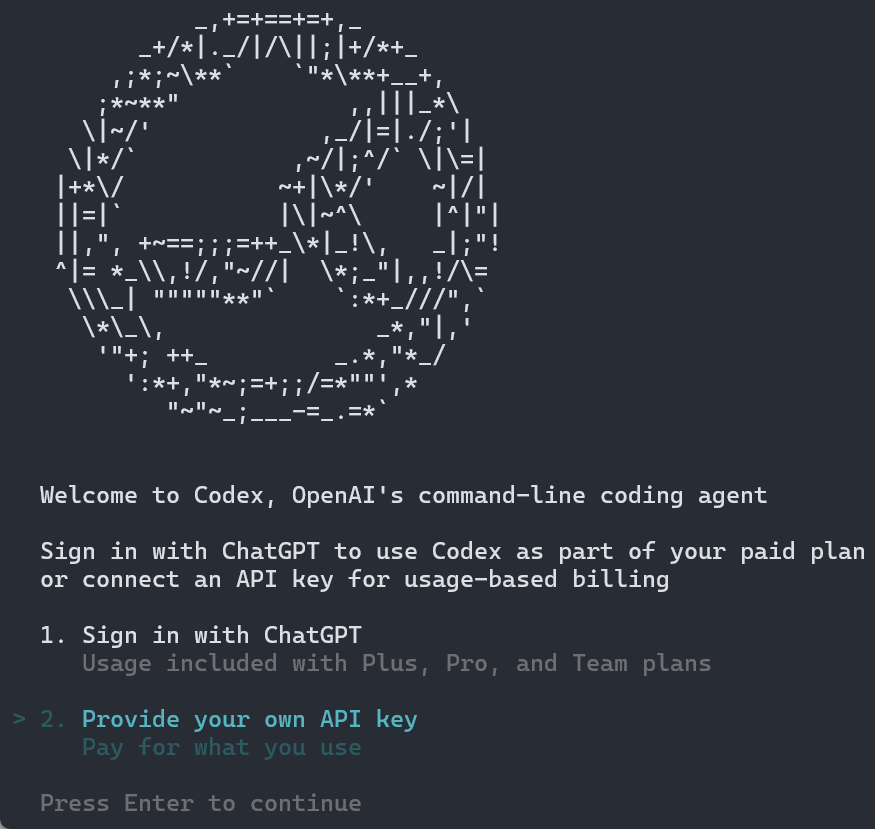
这里选择2: Continue anyway,如下图,会自动打开浏览器,要求登录Openai,此时按Exc 键退出登录:
此时会出现如下界面:如果你有OpenAI的API Key,则可以选择2,来配置OpenAI API Key:
那么对于大部分用户来说,我没有OpenAI 账号,也没有OpenAI的API key,那么如何使用Codex呢?答案很简单,参考这里 来申请 Yixia API Key,编辑Codex 的配置文件,位置:~/.codex/config.toml,对于Windows用户,位置为:C:\Users\用户名\.codex\config.toml:
model = "gpt-5"
model_reasoning_effort = "medium"
model_provider = "yixia"

[model_providers.yixia]
name = "Yixia API"
base_url = "https://api.yixia.ai/v1"
env_key = "YIXIA_API_KEY"
wire_api = "chat"
query_params = {}

[model_providers.ollama]
name = "Ollama"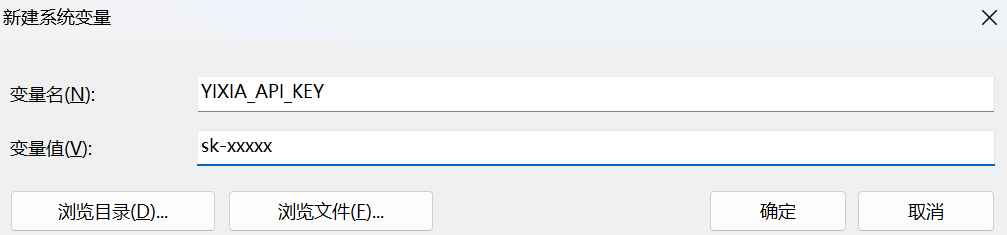
base_url = "http://localhost:11434/v1"然后配置环境变量:YIXIA_API_KEY 对应的值为你申请到的Yixia API Key:
- 对于Windows用户,请依次点击
此电脑右键---属性---高级系统设置---环境变量---系统变量---新建,如下图,将sk-xxxxx替换为你的Key,然后点击确定保存。
- 对于
Linux或Mac用户,请打开命令行,然后执行如下命令,将sk-xxxxx替换为你的Key:
## bash 用户
echo "export YIXIA_API_KEY=sk-xxxxx" >> ~/.bashrc
## zsh 用户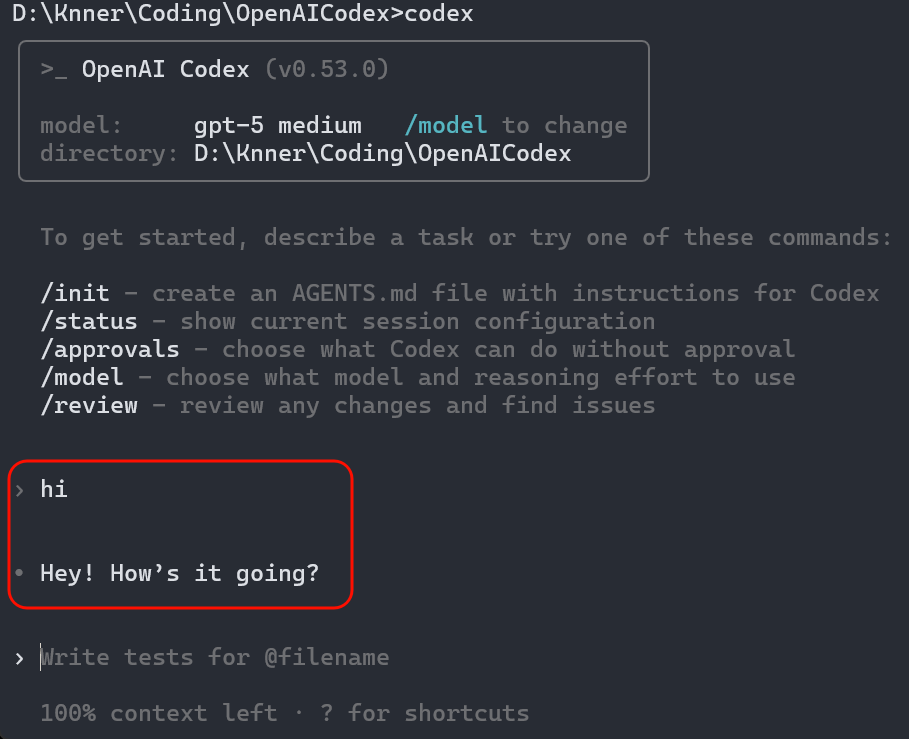
echo "export YIXIA_API_KEY=sk-xxxxx" >> ~/.zshrc然后重启命令行,再次执行命令:codex,输入hi ,有返回表示成功,如下图:
Codex 的基本使用
codex 的命令帮助:
D:\Knner>codex --help
Codex CLI

If no subcommand is specified, options will be forwarded to the interactive CLI.

Usage: codex [OPTIONS] [PROMPT]
       codex [OPTIONS] <COMMAND> [ARGS]

Commands:
  exec        Run Codex non-interactively [aliases: e]
  login       Manage login
  logout      Remove stored authentication credentials
  mcp         [experimental] Run Codex as an MCP server and manage MCP servers
  mcp-server  [experimental] Run the Codex MCP server (stdio transport)
  app-server  [experimental] Run the app server
  completion  Generate shell completion scripts
  sandbox     Run commands within a Codex-provided sandbox [aliases: debug]
  apply       Apply the latest diff produced by Codex agent as a `git apply` to your local working tree [aliases: a]
  resume      Resume a previous interactive session (picker by default; use --last to continue the most recent)
  cloud       [EXPERIMENTAL] Browse tasks from Codex Cloud and apply changes locally
  features    Inspect feature flags
  help        Print this message or the help of the given subcommand(s)

Arguments:
  [PROMPT]
          Optional user prompt to start the session

Options:
  -c, --config <key=value>
          Override a configuration value that would otherwise be loaded from `~/.codex/config.toml`. Use a dotted path
          (`foo.bar.baz`) to override nested values. The `value` portion is parsed as JSON. If it fails to parse as
          JSON, the raw string is used as a literal.

          Examples: - `-c model="o3"` - `-c 'sandbox_permissions=["disk-full-read-access"]'` - `-c
          shell_environment_policy.inherit=all`

      --enable <FEATURE>
          Enable a feature (repeatable). Equivalent to `-c features.<name>=true`

      --disable <FEATURE>
          Disable a feature (repeatable). Equivalent to `-c features.<name>=false`

  -i, --image <FILE>...
          Optional image(s) to attach to the initial prompt

  -m, --model <MODEL>
          Model the agent should use

      --oss
          Convenience flag to select the local open source model provider. Equivalent to -c model_provider=oss; verifies
          a local Ollama server is running

  -p, --profile <CONFIG_PROFILE>
          Configuration profile from config.toml to specify default options

  -s, --sandbox <SANDBOX_MODE>
          Select the sandbox policy to use when executing model-generated shell commands

          [possible values: read-only, workspace-write, danger-full-access]

  -a, --ask-for-approval <APPROVAL_POLICY>
          Configure when the model requires human approval before executing a command

          Possible values:
          - untrusted:  Only run "trusted" commands (e.g. ls, cat, sed) without asking for user approval. Will escalate
            to the user if the model proposes a command that is not in the "trusted" set
          - on-failure: Run all commands without asking for user approval. Only asks for approval if a command fails to
            execute, in which case it will escalate to the user to ask for un-sandboxed execution
          - on-request: The model decides when to ask the user for approval
          - never:      Never ask for user approval Execution failures are immediately returned to the model

      --full-auto
          Convenience alias for low-friction sandboxed automatic execution (-a on-failure, --sandbox workspace-write)

      --dangerously-bypass-approvals-and-sandbox
          Skip all confirmation prompts and execute commands without sandboxing. EXTREMELY DANGEROUS. Intended solely
          for running in environments that are externally sandboxed

  -C, --cd <DIR>
          Tell the agent to use the specified directory as its working root

      --search
          Enable web search (off by default). When enabled, the native Responses `web_search` tool is available to the
          model (no per‑call approval)

      --add-dir <DIR>
          Additional directories that should be writable alongside the primary workspace

  -h, --help
          Print help (see a summary with '-h')

  -V, --version
          Print version
基础命令:
# 交互式
codex

# 带初始提示词的交互式启动
codex 'fix lint errors'

# 非交互式自动化模式
codex exec 'explain utils.ts'
Codex 的重要交互式命令
/init
让Codex通读当前文件夹,codex会把学到的关于项目的信息保存到一个叫AGENTS.md的文件里面,类似于claude code 的CLAUDE.md。
后续跟codex的所有对话,都会带上这个文件作为上下文,这个文件有助于AI更快速的理解整个项目。当然也可以手动修改这个文件,来补充上一些重要的知识。
/compact
用来压缩对话的上下文。执行后,codex会吧之前的会话中的一些不重要的排除掉,来节省Token,从而提高AI的专注力。
/new
新开对话,并且清除之前的对话记录,当我们需要开启一个新任务的时候,就需要new一下。
/approvals
可以调整codex的运行权限,有三个挡位:
- Read Only:只读模型下,所有修改操作都需要人工审核。
- Auto:自动模式,只有敏感操作需要人工审核。
- Full Access:不需要人工审核,可以自行执行命令修改文件。
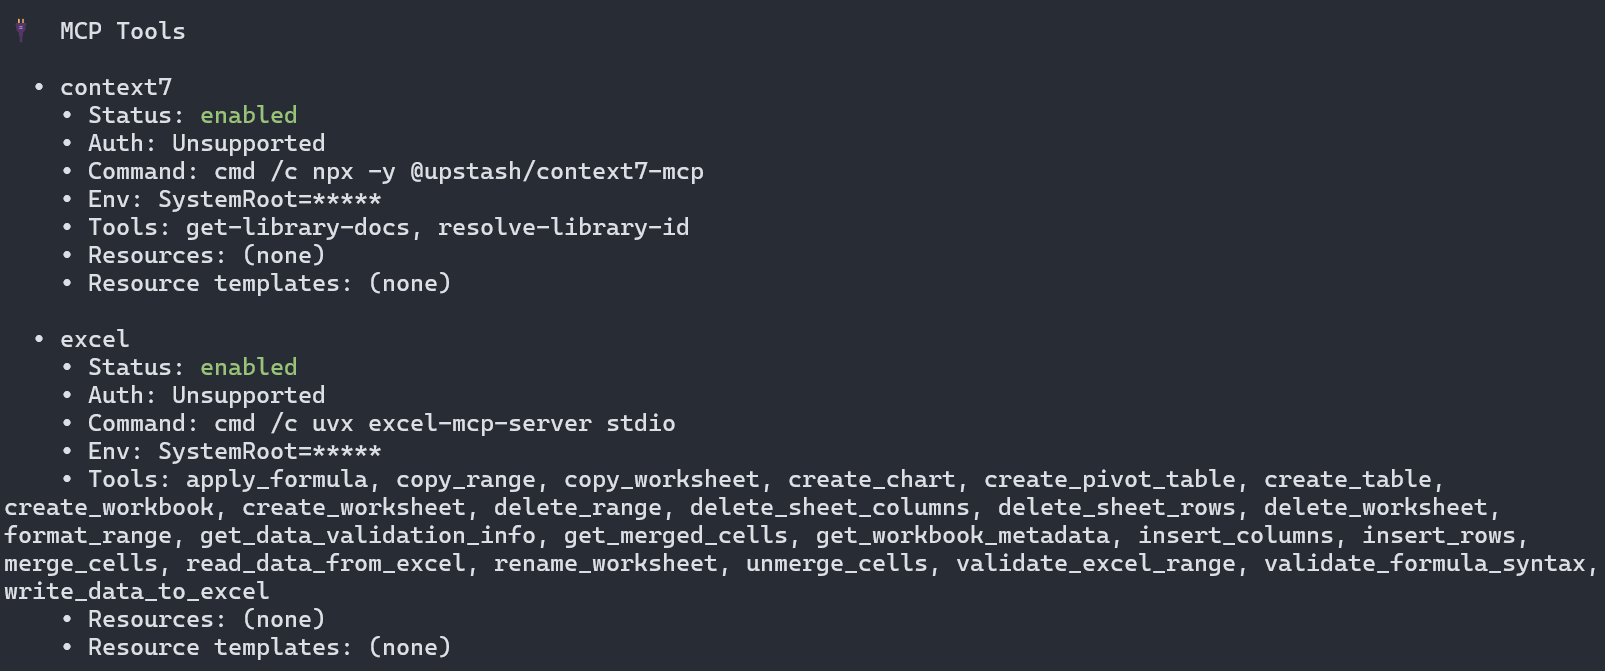
/mcp
列出所有安装过的mcp工具。[参考](#Codex 安装MCP)
核心配置详解
~/.codex/config.toml 是 Codex 核心配置文件。
全局配置,这些选项需要放在配置文件的开头部分:
# 模型选择(GPT-5 + Medium推理)
model = "gpt-5"
model_reasoning_effort = "medium"

# 默认模型提供商
model_provider = "yixia"

# 沙盒策略(支持 read-only、workspace-write以及danger-full-access)
sandbox_mode = "workspace-write"

# 审批策略(支持 on-failure、on-request、untrusted以及never)
approval_policy = "on-failure"
然后是模型提供商配置(model.providers.xxx)以及 Profile(profiles.xxx) 配置:
model.providers: 主要定义了AI提供商的配置,比如:base_url, api_key, 查询参数等。profiles:主要定义了模型和AI提供商的组合配置,方便配置的复用。
# Model Providers
[model_providers.yixia]
name = "Yixia API"
base_url = "https://api.yixia.ai/v1"
env_key = "YIXIA_API_KEY"
wire_api = "chat"
query_params = {}

[model_providers.ollama]
name = "Ollama"
base_url = "http://localhost:11434/v1"

# Profiles
[profiles.gpt5]
model = "gpt5"
model_provider = "yixia"
approval_policy = "never"
model_reasoning_effort = "high"
model_reasoning_summary = "detailed"

[profiles.qwen3]
model = "qwen3-coder"
model_provider = "ollama"
配置好之后,你可以通过 Codex 的命令行参数来选择配置文件,比如 codex -p <profile>;当然,也可以用 codex -m <model> 来覆盖默认模型。
Codex 安装MCP
context7 MCP
对于mcp的安装,也是通过配置文件:~/.codex/config.toml。
对于Linux、mac 用户,将下列配置写入到~/.codex/config.toml:
[mcp_servers.context7]
command = "npx"
args = ["-y", "@upstash/context7-mcp"]
startup_timeout_ms = 20_000
对于Windows用户:
[mcp_servers.context7]
command = "cmd"
args = [
	"/c",
	"npx",
	"-y",
	"@upstash/context7-mcp"
]
env = { SystemRoot="C:\\Windows"}
startup_timeout_ms = 20000
Excel MCP
对于Linux、mac 用户,将下列配置写入到~/.codex/config.toml:
[mcp_servers.excel]
command = "uvx"
args = ["excel-mcp-server", "stdio"]
startup_timeout_ms = 40000
对于Windows用户:
[mcp_servers.excel]
command = "cmd"
args = [
	"/c",
	"uvx",
	"excel-mcp-server",
	"stdio"
]
env = { SystemRoot="C:\\Windows"}
startup_timeout_ms = 40000
VSCode Codex 插件
vscode里搜索:codex,然后安装这个:

对于已经完成了 codex cli 的配置,那么,插件则可以直接使用,点击左侧的:OpenAI 图标即可使用:

其他问题
使用自定义模型后,总会默认使用bash来修改文件,导致Windows运行错误:
答:
输入:apply_patch 用这个来修改文件。